
When a staff member or admin drafts an engagement letter on behalf of a partner, they can route the letter for review using the Create and Send for Approval option during the finalize step. This sends the letter to the assigned partner (or whichever team role your firm uses, such as Audit Partner, Main Partner, or a custom role) for review before it goes to the client.
For the Creator (Staff or Admin)
Step 1 — Finalize the Letter with Approval Routing
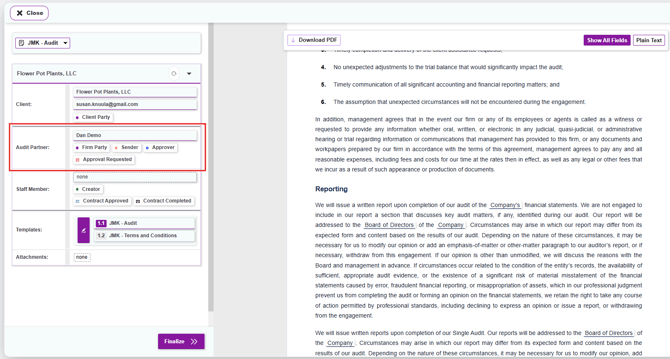
When you reach the final step of creating your engagement letter, (after you've selected your client, chosen your template, filled in the client fields, and assigned your team) you'll click the Finalize button to open the sending options:
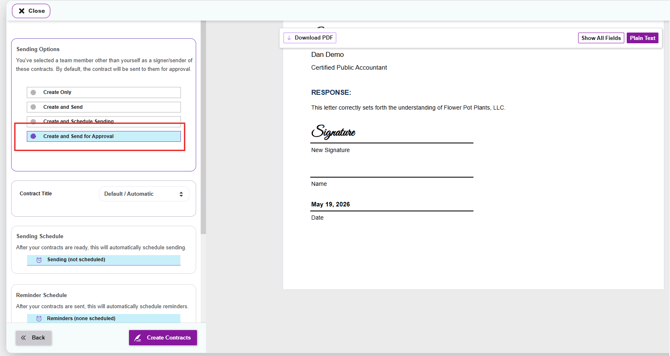
- In the Sending Options section, select Create and Send for Approval
- Click Create Contracts
Tip: Need help with the earlier steps? See How to Create a Contract from Start to Finish for a full walkthrough of building the engagement letter.
Step 2 — What Happens Next
- The assigned Approver (partner) receives an email notification that a letter is waiting for their review
- The letter appears in Knuula with a status of Pending Approval
- You'll receive an email notification once the partner approves the letter
For the Partner (Approver)
As an approver, your job is to either approve the letter as-is or edit it before approving. The steps below cover both paths.
Step 1 — Locate Letters Awaiting Your Review
You can access letters awaiting your review in two ways:
- Click the link in the email notification you received — this takes you directly to the letter
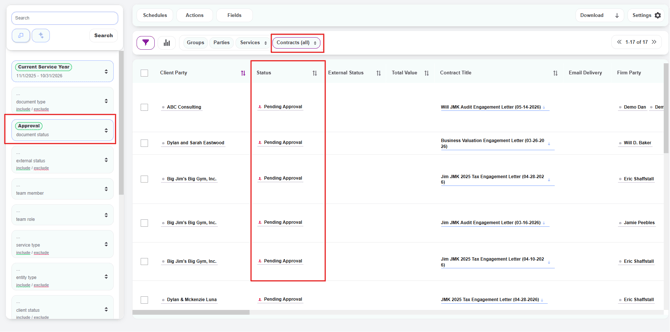
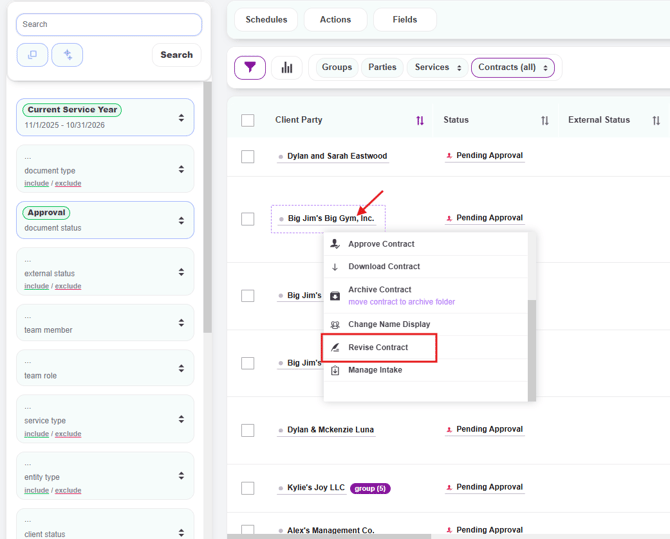
- Or, log in to Knuula, go to the Contracts page, and filter by document status: Approval in the left filter panel. The Status column will display Pending Approval for any letters waiting approval at your firm
- Filter further by team member and team role to narrow the list of letters waiting approval
Step 2 — Open the Action Menu
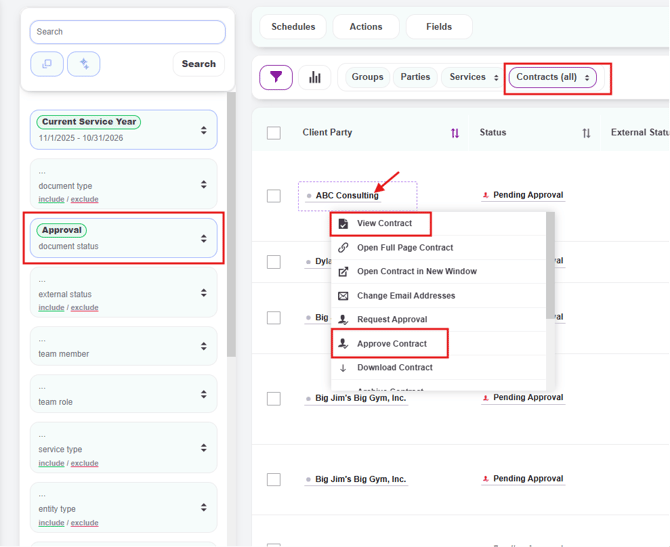
Click on the contract title for the letter you want to review. A pop-up menu will appear with three options specific to approval:
- View Contract — Opens the letter so you can read through it before deciding what to do. This is the recommended path because it lets you see the actual draft and allows you to Approve or Approve and Send in one click (see Step 3, Option A)
- Approve Contract — A faster path to approve the letter without opening it. This path includes a confirmation panel before the approval is finalized (see Step 3, Option B)
- Revise Contract — Opens the letter directly in the dynamic document review screen so you can make edits before approving (see Step 4)
Step 3 — Approve the Letter
You have two ways to approve a letter, depending on the option you selected from the action menu. Choose one — not both.
Option A — Approve via the View Contract Screen (Recommended)
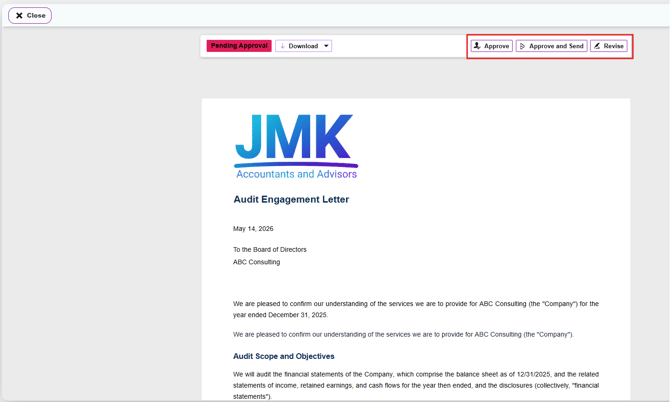
When you click View Contract, the letter opens in a read-only view with a Pending Approval badge in the top left. Across the top right of the letter, you'll see three action buttons:
- Approve — Approves the letter immediately. The page updates to show a green Contract Approved banner and the status changes to Ready to Send
- Approve and Send — Approves the letter and immediately sends it to the client for signature in one step. The status changes to Sent
- Revise — Opens the dynamic document review screen so you can edit fields before approving (see Step 4)
Option B — Approve via the Approve Contract Action (Faster Path)
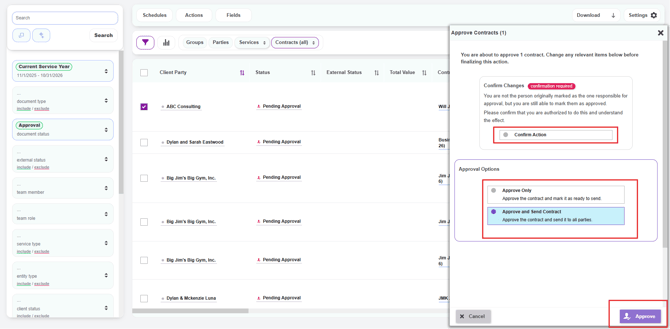
If you selected Approve Contract from the action menu instead of opening the letter, an approval panel will slide out on the right side of the screen titled Approve Contracts (1):
- Under Confirm Changes, click Confirm Action to acknowledge you are authorized to mark the letter as approved
- Under Approval Options, choose one of the following:
- Approve Only — Approves the contract and marks it as Ready to Send. Use this when the creator (or another team member) will handle sending the letter to the client
- Approve and Send Contract — Approves the contract and immediately sends it to the client for signature. The status changes to Sent
- Click the purple Approve button in the bottom right corner to finalize
Tip: Your firm's notification workflows determine who gets emailed at each stage. If you're unsure how your firm is set up, check with your Knuula admin.
Step 4 — Revise the Letter (If Edits Are Needed)
If the letter needs changes before you can approve it, click Revise from any of these places:
- The View Contract screen (top right)
- The contract title pop-up menu (the menu that appears when you click the contract title from the Contracts page)
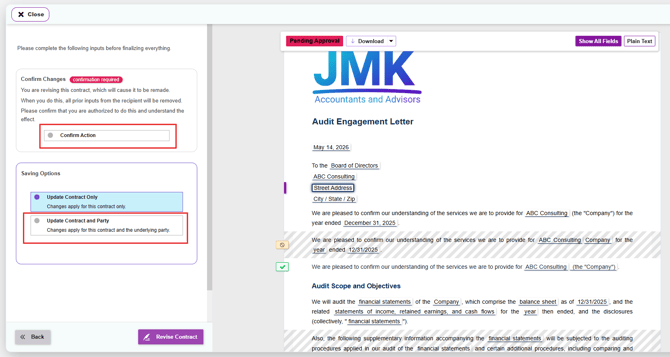
Either path opens the dynamic document review screen with a Pending Approval badge at the top:
- Review the content, client information, fields, and team assignments in the draft
- Click any field directly in the letter to update it
- Use the Plain Text view in the top right to see the clean final version without field highlights
- Use Show All Fields to return to edit mode
- Click Next once finished making changes

- You'll then be asked to:
- Confirm Action to acknowledge that prior recipient inputs will be removed (revising remakes the contract)
- Choose a Saving Option:
- Update Contract Only — Changes apply only to this specific contract
- Update Contract and Party — Changes apply to this contract AND update the underlying party record (use this if the change reflects a permanent correction to the client's info)
- Click Revise Contract to save
After revising, return to either Option A (View Contract) or Option B (Approve Contract) to approve the updated letter.