
Important: Revising erases any work the client has already done on the contract — completed fields and partial signatures will be lost and the contract status will revert to Sent.
Step 1 — Open the Revise Action
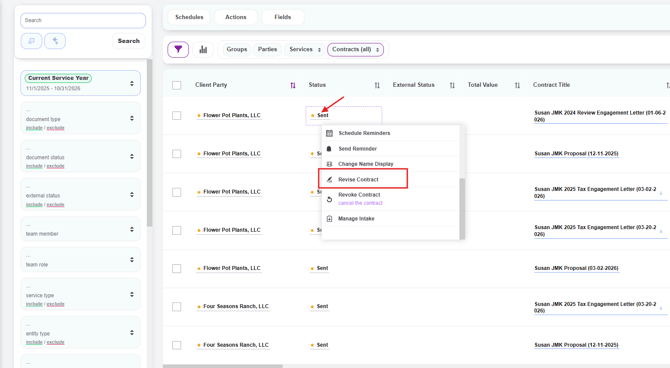
- From the Contracts page, click the contract title (or status) for the letter you want to update
- From the action menu, select Revise Contract
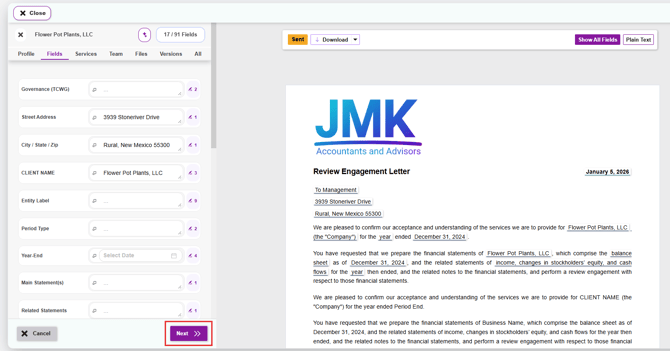
- The dynamic document review screen will open, showing the contract on the right and a field panel on the left
Step 2 — Make Your Edits
In the document review screen, you can update any client field, fee, date, or other editable content:
- Click any field directly in the letter on the right (or use the field panel on the left) to update its value
- Type or select the new value — the contract will update in real time
- Use the Plain Text view in the top right to see the clean final version without field highlights
- Use Show All Fields to return to edit mode if you switched to Plain Text
- When you've finished making changes, click the purple Next button in the bottom right corner
Step 3 — Confirm and Choose Your Options
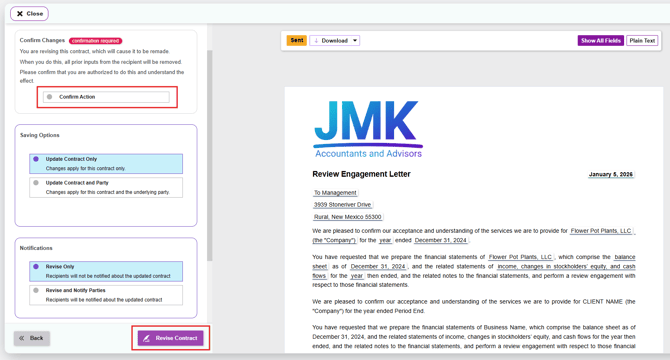
After clicking Next, a panel will appear with three sections you need to complete before finalizing:
-
Click Confirm Action to acknowledge and proceed.
-
Choose where the changes should be applied:
-
Update Contract Only — Applies the changes only to this specific contract. The underlying party record stays unchanged. Use this when the change is one-time or specific to this engagement
-
Update Contract and Party — Applies the changes to this contract AND updates the underlying party record. Use this when the change reflects a permanent correction to the client's information that should carry forward to all future contracts
-
-
Decide whether to notify the recipients about the updated contract:
-
Revise Only — Recipients will not be notified about the updated contract. Use this for internal corrections or minor edits the client doesn't need to be alerted to
-
Revise and Notify Parties — Recipients will be notified about the updated contract via email. Use this when the change is significant enough that the client should be aware (e.g., updated fees, scope changes, new dates)
-
Step 4 — Finalize the Revision
- Click the purple Revise Contract button in the bottom right corner to save your changes
- Click Back if you need to return to the editing screen, or Close to discard the revision
What Happens After You Revise
- The contract is remade with your updated content. Any prior recipient inputs are removed
- If the contract had already been sent and opened by the client, the status will revert back to Sent, meaning the client will need to reopen and re-complete the contract
- If you selected Revise and Notify Parties, the recipients will receive an email about the updated contract. If you selected Revise Only, no email is sent
- If you selected Update Contract and Party, the underlying party record is also updated to reflect the new information