The Reminders feature in Knuula helps you automatically follow up with clients who haven't yet signed their engagement letter. Instead of manually tracking and chasing outstanding signatures, you can set up reminder schedules that run on autopilot — sending follow-ups at the intervals you define.
Note: Knuula has two types of schedules: Sending Schedules (which control when contracts are sent to recipients) and Reminder Schedules (which control when reminders are sent for contracts already delivered). This article focuses on Reminder Schedules.
Section 1 — Create a Reminder Schedule
Step 1 — Open the Manage Schedules Panel
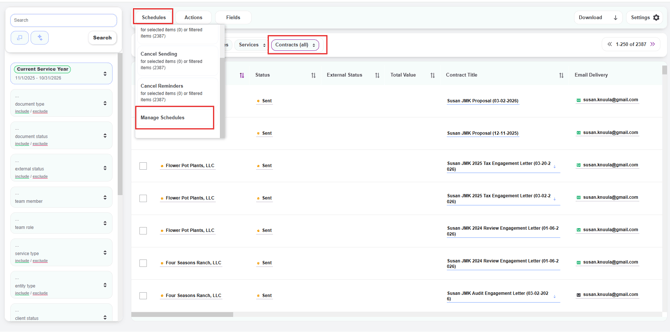
- From the Contracts page, click the Schedules button at the top of the page
- A dropdown will appear with several options. Click Manage Schedules
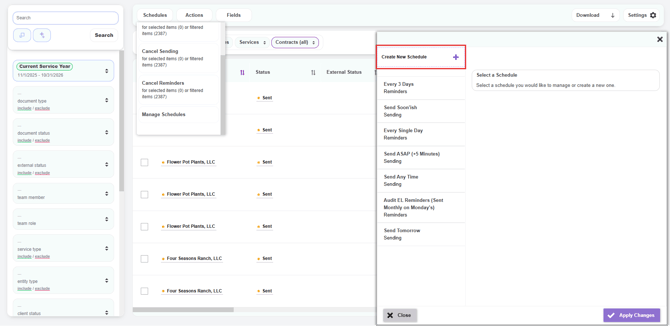
Step 2 — Click Create New Schedule
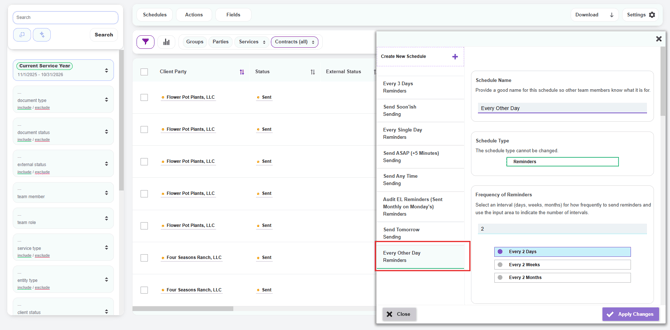
- A panel will slide out on the right showing all existing schedules at your firm (e.g., Every 3 Days, Send ASAP, Audit EL Reminders, etc.)
- At the top of the panel, click Create New Schedule
Step 3 — Configure the Schedule
You'll be prompted to fill in the following details:
- Schedule Name — Give your schedule a clear, descriptive name so other team members know what it's for (e.g., "Audit EL Reminders — Every Other Day")
- Schedule Type — Select Reminders (the other option, Sending, is for scheduling when contracts are sent rather than reminded). Sending schedules create reminders for contracts you've already sent
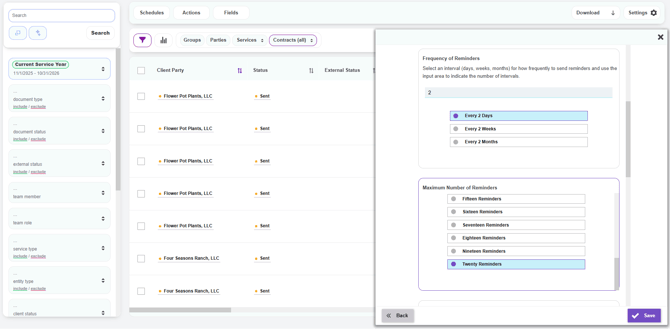
- Frequency of Reminders — Choose how often reminders should be sent. Select an interval (days, weeks, or months) and enter a number to define the cadence (e.g., Every 2 Days, Every 1 Week, Every 1 Month)
- Maximum Number of Reminders — Choose how many reminders to send before stopping (e.g., Twenty Reminders). This prevents endless follow-ups
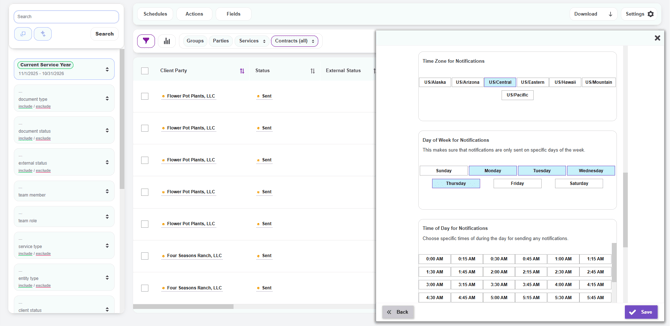
- Time Zone for Notifications — Select the time zone reminders should respect (e.g., US/Central)
- Day of Week for Notifications — Choose which days of the week reminders are allowed to send (e.g., Monday–Thursday). This ensures clients don't get reminders on weekends
- Time of Day for Notifications — Choose the specific times during the day reminders should be sent (e.g., 9:00 AM, 1:00 PM)
Step 4 — Save the Schedule
Click the purple Save button in the bottom right corner. Your new schedule will now appear in the schedules library, ready to be applied to engagement letters.
Section 2 — Apply a Reminder Schedule to Existing Letters
Once you have one or more reminder schedules created (see Section 1), you can apply them to engagement letters that have already been sent. This is useful when you want to add reminders to a batch of letters that didn't have a schedule attached originally, or to switch a group of letters from one schedule to another.
Step 1 — Check the Reminders Column
Before applying a schedule, you can see the current reminder status of each contract:
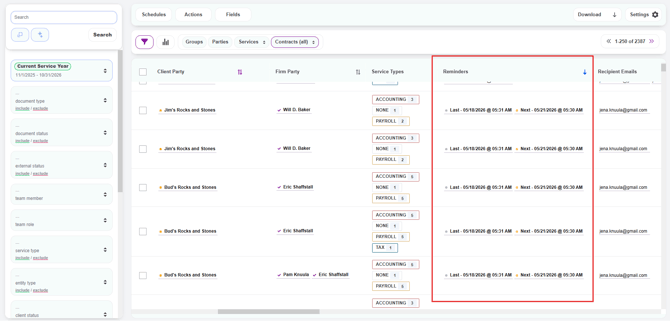
- On the Contracts page, scroll to the right until you see the Reminders column
- For each contract, the column displays:
- Last — The date and time of the most recent reminder that was sent
- Next — The date and time the next reminder is scheduled to send
- If a contract has no reminders set up, the Reminders column will be empty
Tip: Use this column to spot-check which clients are currently receiving reminders and which aren't — helpful for catching letters that may have slipped through without a schedule attached.
Step 2 — Select the Contracts You Want to Schedule
You can apply a reminder schedule to one contract, a group of contracts, or every contract matching a filter:
- To select individual contracts: Check the box to the left of each contract row
- To select all contracts on the current page: Check the box at the top of the column header
- Alternatively, apply filters in the left panel (e.g., filter by document status, document type, or team member) to narrow your list to a specific group of contracts. You'll be able to apply the schedule to all filtered items in a later step
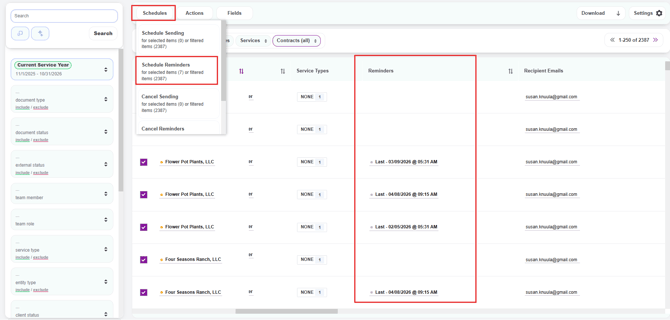
Step 3 — Open the Schedule Reminders Action
- Click the Schedules button at the top of the page
- From the dropdown, click Schedule Reminders. You'll see counts next to the option showing how many items are selected (e.g., "for selected items (7)") and how many match your current filter (e.g., "or filtered items (2387)")
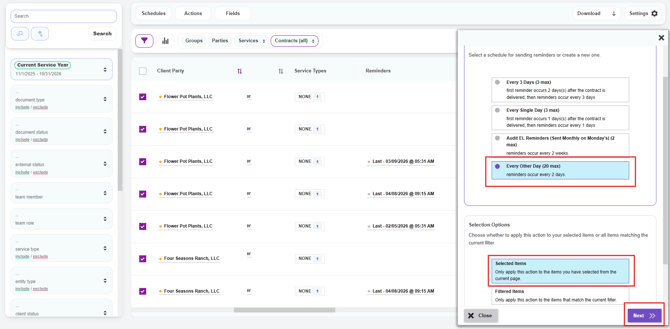
Step 4 — Choose and Apply a Reminder Schedule
A panel will slide out on the right side of the screen showing all available reminder schedules at your firm. Each schedule displays its name, maximum reminder count, and cadence (e.g., Every Other Day (20 max) — reminders occur every 2 days).
- Click the schedule you want to apply — it will be highlighted in blue
- Under Selection Options, choose:
- Selected Items — Applies the schedule only to the contracts you checked
- Filtered Items — Applies the schedule to every contract matching your current filter
- Click the purple Next button in the bottom right
- On the Confirm Schedule panel, click Confirm Action to acknowledge that any previously scheduled reminders for these contracts will be replaced
- Click the purple Apply Schedule button in the bottom right to finalize
Important: Applying a new reminder schedule overwrites any existing reminder schedule on those contracts. If a contract already had reminders queued up under a different schedule, those will be canceled and replaced with the new schedule.
Step 5 — Verify the Schedule Was Applied
After applying the schedule, refresh your browser page to see the updated reminder details in the Reminders column. Once refreshed, you should see Last and Next reminder dates populated for each contract you applied the schedule to.

Important: Reminders will only apply to contracts that have been sent but are not yet signed. The schedule will not apply to:
-
Contracts that have not yet been sent (i.e., still in Created or Ready to Send status) — there's nothing to remind a client about until the letter has been delivered
-
Contracts that have already been signed and completed — once a client has signed, no further reminders are needed
-
If you applied the schedule to a mixed batch of contracts (some sent, some signed, some not yet sent), the schedule will only take effect on the ones in an active "awaiting signature" state
-
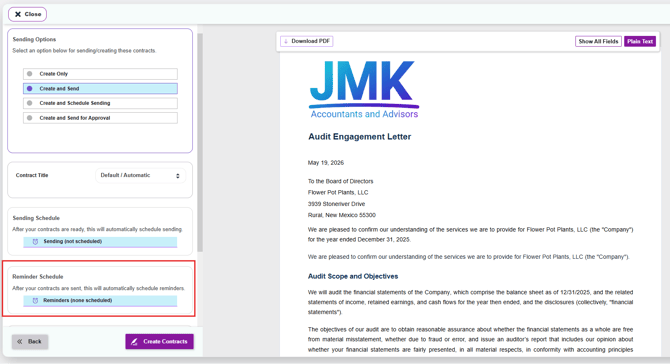
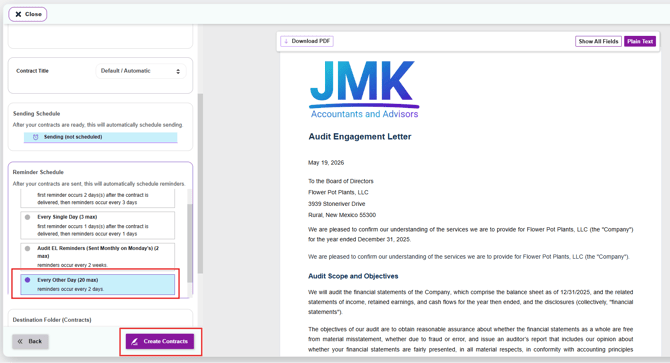
Section 3 — Add a Reminder Schedule When Creating a Letter
When finalizing a new engagement letter (covered in How to Create a Contract from Start to Finish), you can attach a reminder schedule so reminders begin automatically once the letter is sent.
- Follow the standard letter creation steps until you reach the Finalize step
- In the Reminder Schedule section, click the dropdown to select an existing schedule from your firm's library
- The reminders will automatically apply once the letter is sent to the client